Classic "handwork" meets high-tech 3D modeling
First of all: 3D visualization is not just 3D visualization.
Because the application of 3D visualization tools is wide-ranging: from the utterly abstract art form to illustrative representations of processes and interrelationships, marketing images for real estate and products, or cinematic documentary representations. All applications have one thing in common: The basis is always a three-dimensional model (a wireframe model), which is staged accordingly.
1. Create models or convert them from design data
The outstanding advantage of 3D tools over classic mapping options is that any conceivable shape and any situation can be created from "nothing". Any idea can become real for the representation of a situation, no matter how impossible this would be in the real world. However, as in the real world, the more details are available or desired, and the higher the degree of reality, the more complex the creation of the model. This is because, like in the real world, each object must first be "modeled" with all its peculiarities and details, i.e., digitally built.
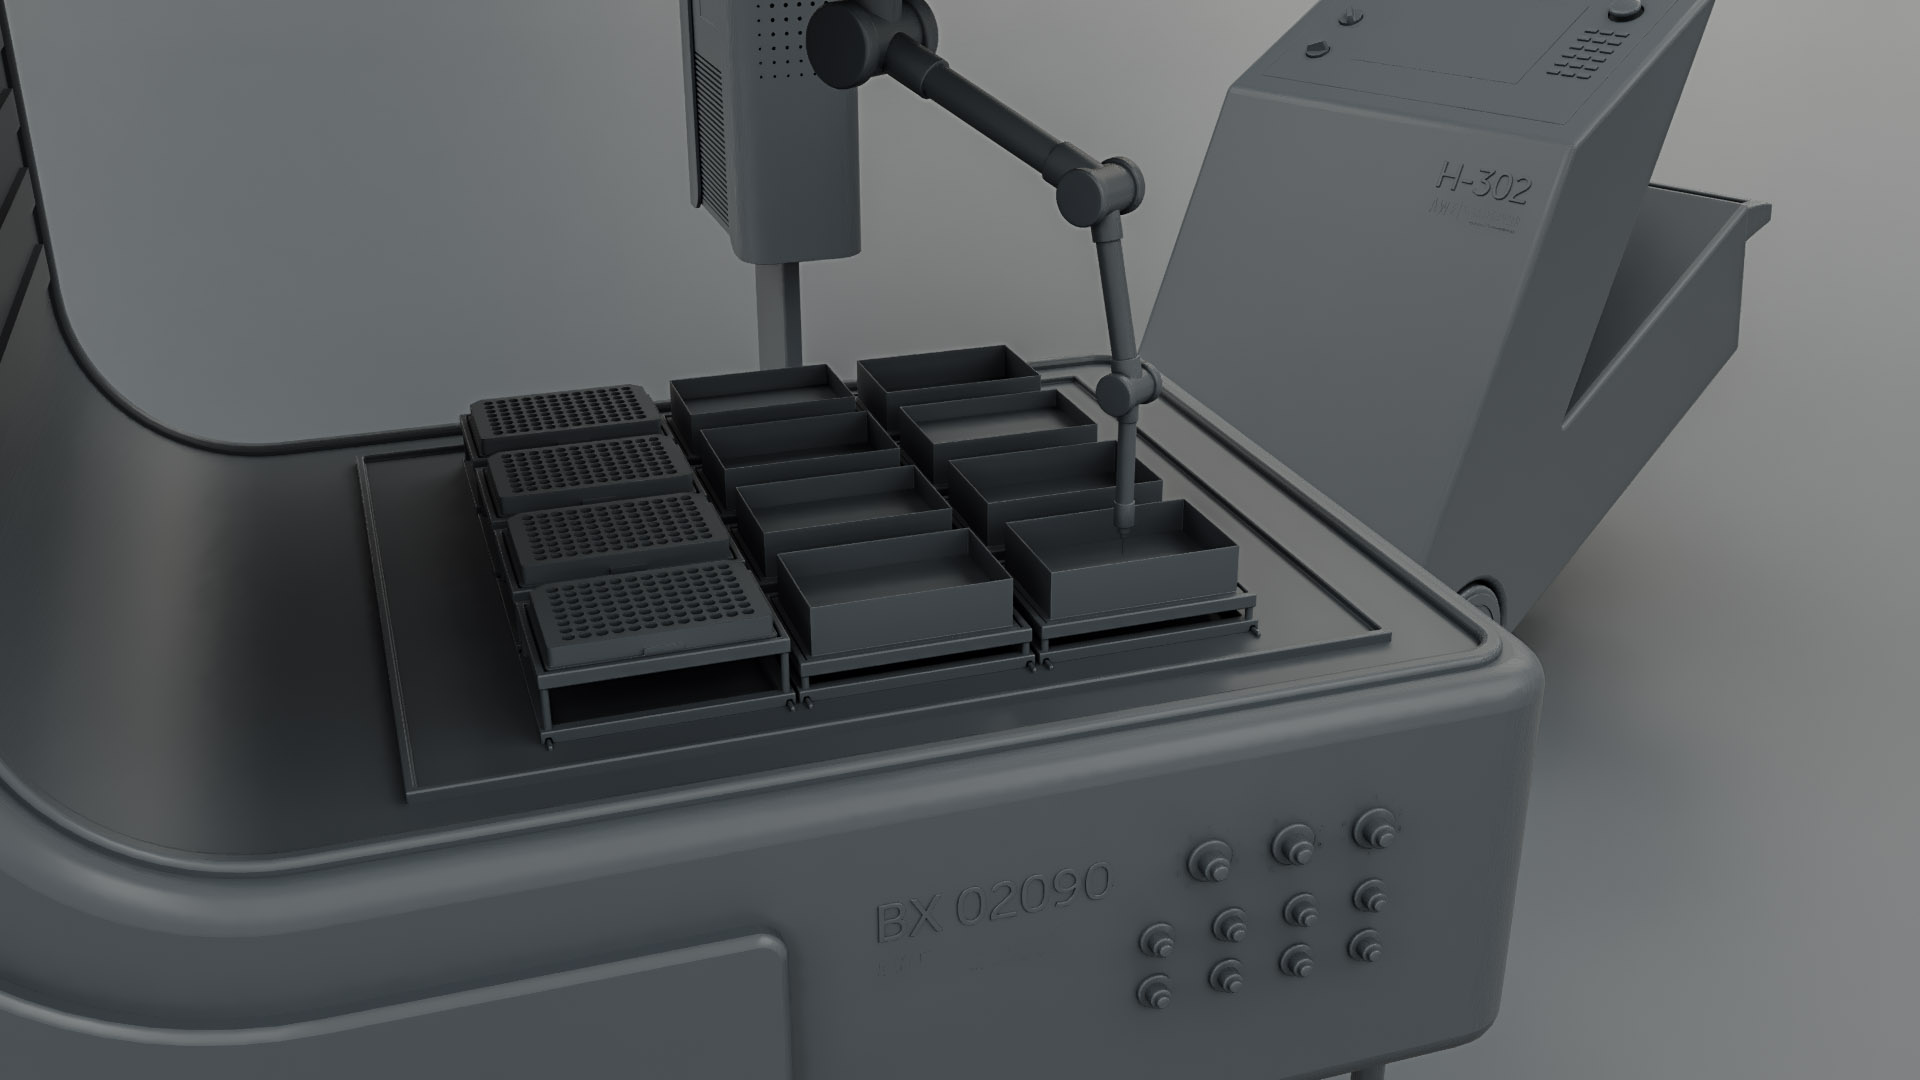
When representing existing objects, it helps that CAD data from the design can be used to create a virtual image. For this purpose, the digitally available design data is imported and converted into polygon data. The descriptive (parametric) data, in which dimensions, positions, and technical properties are recorded, are converted into a grid. This represents the shape with countless triangles or quadrilaterals as accurately as possible.
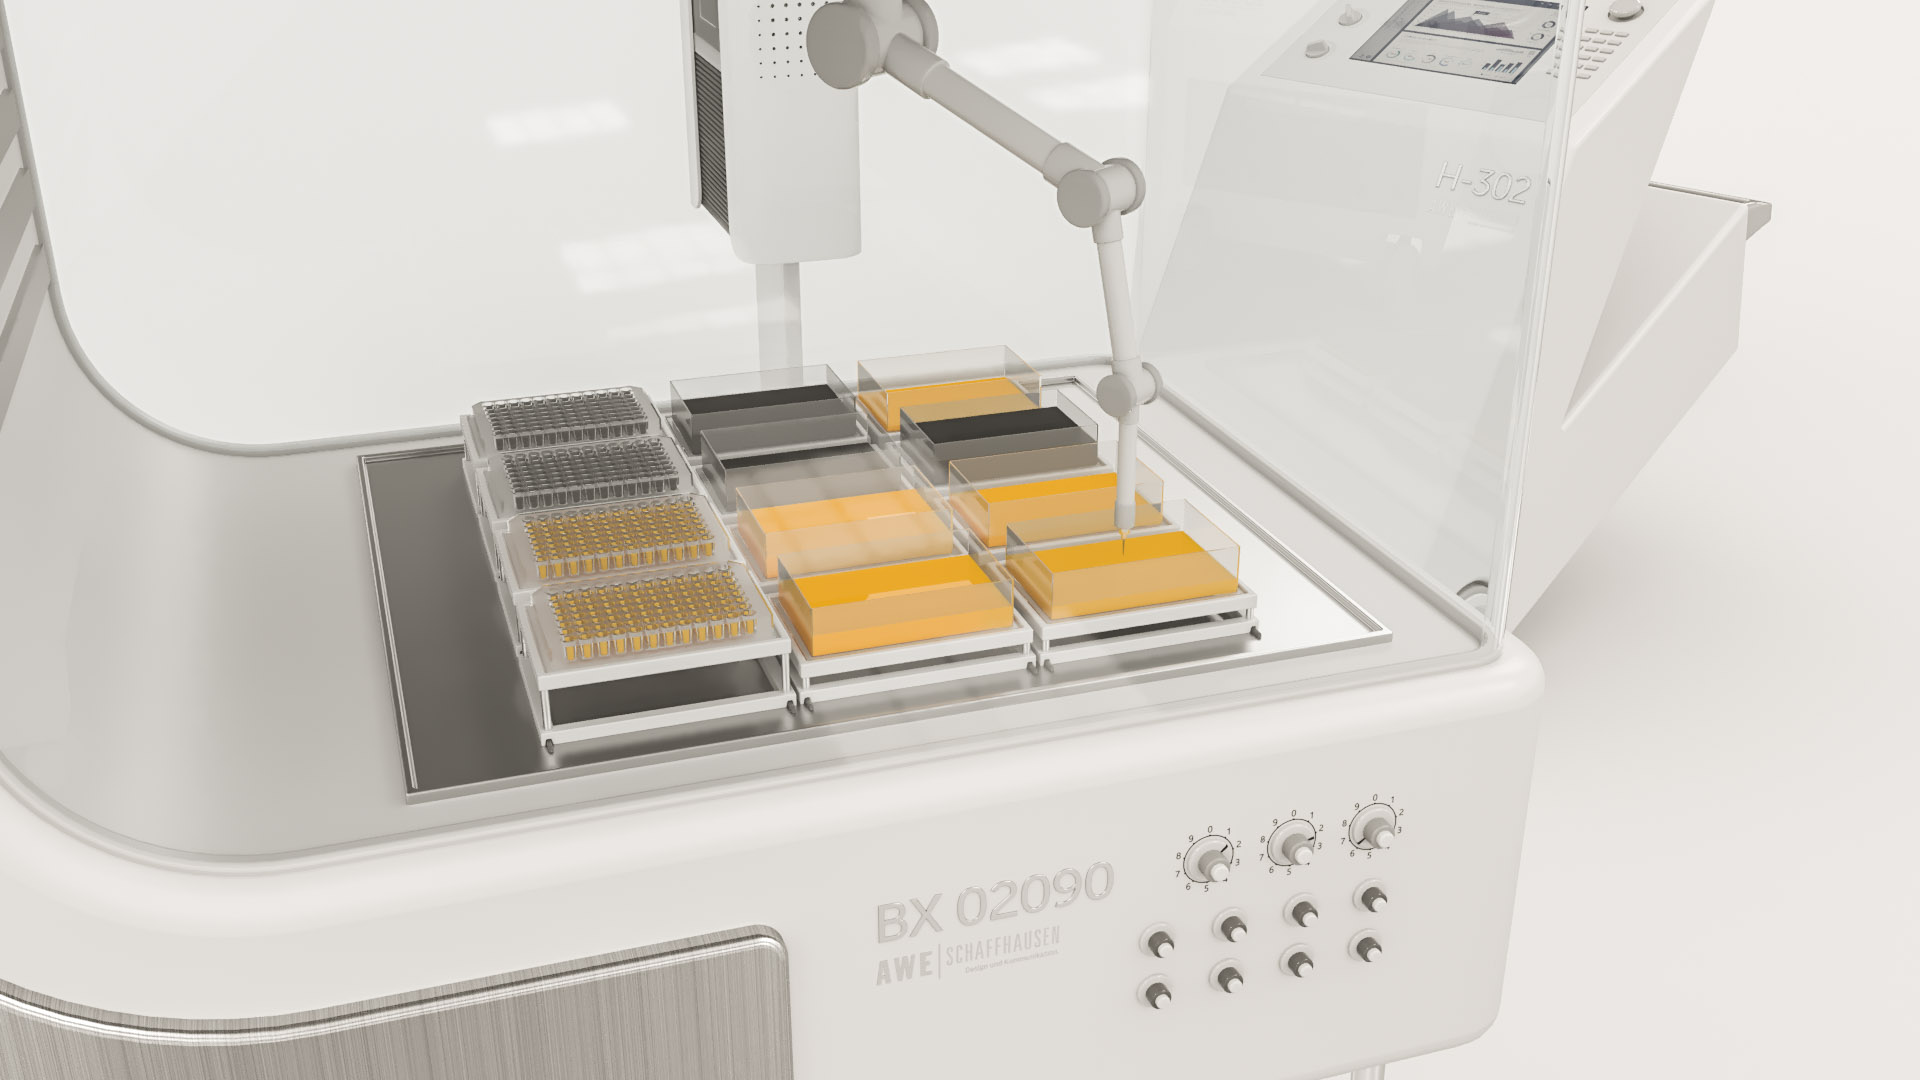
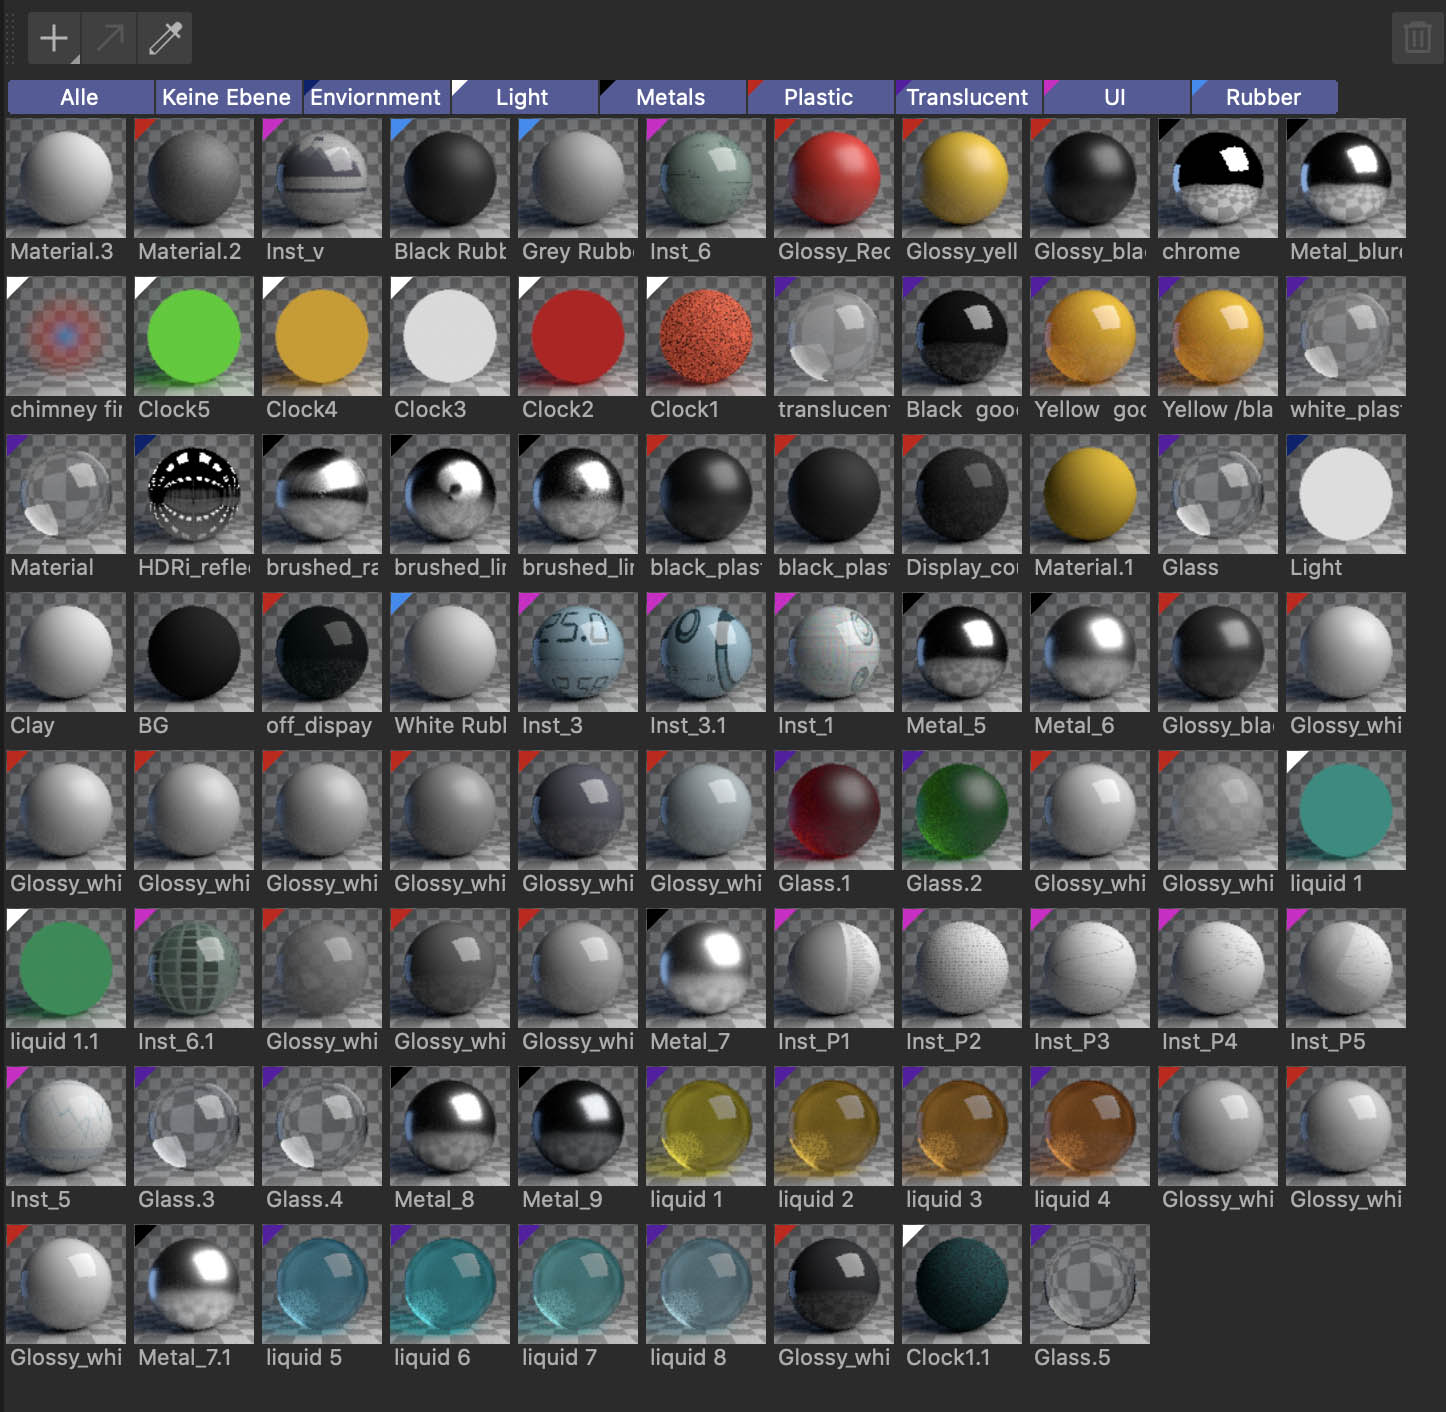
2. Materialize the surfaces of the polygon objects
The closer a visualization comes to the real world, the more convincing the result. Software for visualizations, therefore, mimics the optical-physical counterparts of the real world as closely as possible. This is made possible by taking into account numerous parameters, which in combination result in the almost perfect illusion:
- Colorfulness (and pattern)
- Reflection and mirroring
- Transparency
- Roughness
- Volume scattering
- Luminosity
A material must now be created for each color and visual detail of a model. This applies to every element that has its "own" look in the real world - for example, glass, chrome steel, aluminum, painted surfaces, labeled surfaces, luminous elements, displays, and so on.
3. Light the scene and set up cameras
Even the most sophisticated materialization does not make the scene realistic. As in real photography - or real film - it's the light that makes the picture. A studio is needed. Camera(s), light, and environment.
When it comes to light, it's essentially the same as in real life - small spots for sharp shadows, large area lights for soft shades. HDRI lighting makes a real difference. These work with image material photographed on real sets (indoors and outdoors) and then applied to the scene. This also makes it possible to achieve realistic reflections on glass and metallic surfaces without having to recreate the entire environment in three dimensions.
The virtual camera also behaves as it would in the real world. The 3D software simulates lenses, aperture settings, and shutter speeds. This also makes it possible to simulate real-world effects such as depth of field and motion blur. Finding the right angle of view is the work of the "cameraman".
4. A scene turns into an animation
Previously, we started from "stills" - single still images as they are needed in product photography or illustration. The complexity increases when the artificial world begins to move. While simple camera movements through the already-created environment can still be accomplished with relatively manageable effort, animation demands new skills.
On the one hand, animation makes it necessary for objects (and entire environments) to be displayed correctly from all sides - and not from one perspective only. If we depict an object in one corner, time can be saved - as in scenery construction - because the entire room is not recreated. If the camera now moves, the visible area becomes larger, and so does our "backdrop".
In addition, objects must first be made to move correctly. In the case of technical objects such as robots or vehicles, this means that they first have to be built up correctly and then "rigged". Technical relationships - such as a wheel attached to the axle, which is connected to the motor and steering - must first be created. Then "programming" is carried out, which describes what happens when I turn the steering wheel or step on the gas. The model does not know how the wheel, with all its parts, should move in relation to other connected elements.
4b. 3D doll becomes a character
In the "organic" animation, everything gets a bit more complex. Here the animation makes a massive difference to the model for the still image.
For example, to simulate a human body, it must be provided with a digital skeleton (a rig) (after it has been modeled and materialized). Here, everything is still the same as with technical objects (in so-called hard surface modeling) because here, too, the hierarchy means everything: fingertip hangs on the finger, hangs on the palm, hangs on the forearm, hangs on the upper arm, hangs on the shoulder... So if I pull on the little finger, the shoulder should move too... So far, so good.
But now, the skeleton has to be connected to the "shell" of the body. This may sound trivial, but it means that the invisible musculature must be reconstructed. This step mainly describes how far away our shell is from the respective bones of the skeleton. But also how it relates to joints. Without these steps, the skin would be folded and bent unnaturally.
5. Movement in play: animation
Once this so-called rigging is complete, the artificial world must be given life. The desired movements must now be animated in their temporal context. In the case of technical objects, this is done according to timings that can be taken from film templates (so that a robot, for example, does not move unnaturally fast or, to the marketing disadvantage, too slowly).
Motion capture techniques are often used for organic animations: Real movements are captured three-dimensionally and transferred to the respective template. Theoretically, this can already be achieved today with a smartphone. However, the better/smoother this is supposed to look, the more complex and expensive the technology is. High-quality productions, therefore, rely on studios that have specialized in this technology.
And last but not least, the environment must be animated if it is set outside. Similar complexity applies to landscape design as to the basic animation. If you want a stream to flow through the landscape - or trees to move in the wind - simulations are called for. For this purpose, various plug-ins can handle realistic physical simulations and thus bring details into the 3D scene.
6. 3D scene becomes rendering
At the end of the object creation process, the rendering process is materialization, lighting, and animation. Here, the visualization software calculates the final image from the 3D scene. In very simplified terms, the various lights emit individual rays whose direction, bounce, and course are computed under the prevailing physical conditions.
This is done based on each pixel - in other words, the greater the resolution, the longer this calculation takes. And the better the desired quality, the more rays are required, leading to longer rendering time.
If we're talking about film, the render time increases significantly again: depending on the duration and resolution of the film, the calculation time multiplies. A single 4K image on a single (high-performance) computer can quickly take one or several hours of computing time - open to the top. With a minimum of 25 frames per second required for movies, it's easy to guess how long a theatrical movie will take in the rendering process.
Larger productions then shift the computational task to various high-performance computers - or even to dedicated render farms, which go into the field with dozens or hundreds of computers simultaneously. However, this is very costly, which is why the technical optimization of the rendering is of great importance.
7. Rendering turns into image and film
The rendered images are very similar to raw material from shoots: they must be prepared before they can be used.
This means color grading, retouching, and, if necessary, compositing.
In color grading, the raw data is given a color look. The best way to compare this is with handling raw data from digital cameras. The raw data from the camera chip is interpreted and adjusted to the desired look.
During retouching, imperfections and errors from the renderings are touched up. This makes sense, especially if correcting the problem in the 3D software would take disproportionately more time than in image and film editing programs.
AWE Schaffhausen: Partner for 3D content
AWE Schaffhausen has been creating 3D content for the comprehensible presentation of complex topics and the immersive marketing of products and services since 2009.
In addition to classic 3D visualizations and illustrations, the range of services includes content and tools in augmented reality and virtual reality.
In creating objects and content for modern technologies, AWE relies on close partnerships with customers who benefit from the combination of communication and 3D know-how to an extent.
Contact us!
Are you new to the unlimited possibilities of three-dimensional, virtual worlds? Or do have experience and a concrete concern? No matter your case, we will be happy to advise you.